
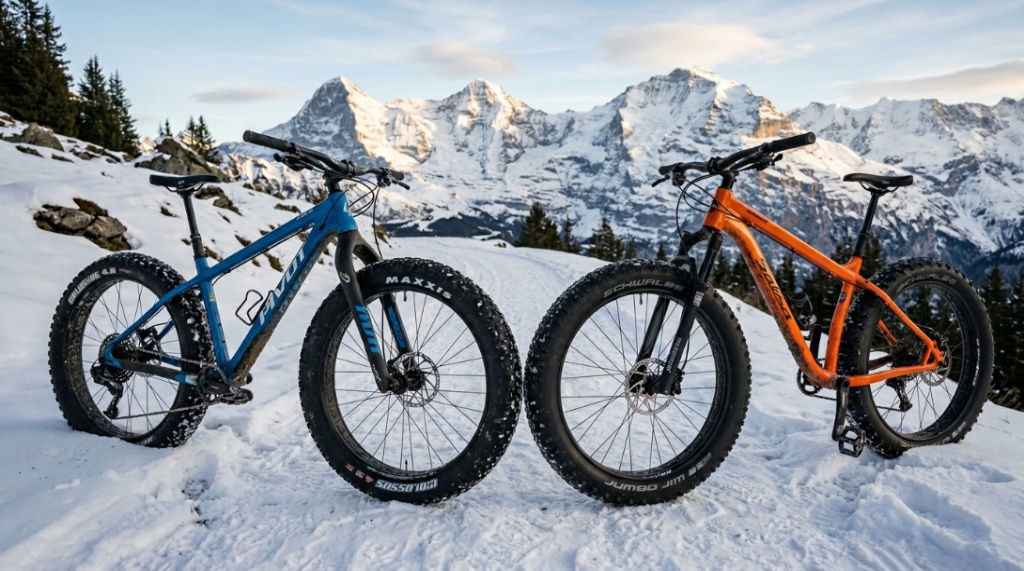
A fat tire mountain bike is a bicycle equipped with oversized tires, typically 3.8 inches wide or larger, designed to provide superior traction and stability on soft, unstable terrain like sand, snow, and mud. If you have ever felt your standard mountain bike sink into loose gravel or slide out on a snowy trail, a fat bike solves that problem by distributing your weight over a much larger surface area. The result is a ride that stays planted and predictable when conditions get tricky. For riders who want year-round trail access or simply crave a more forgiving, cushioned ride over rough terrain, this bike is a game-changer. Before you pull the trigger on any purchase, understanding what sets these bikes apart is the first step toward making a confident decision.
How Do Fat Tire Bikes Differ From Standard Mountain Bikes?
The most obvious difference is the tire width, but the distinctions go far deeper than rubber. Fat tire bikes feature wider rims, frame geometry optimized for low ground pressure, and usually a longer wheelbase to accommodate the larger tires without toe overlap. Standard mountain bikes prioritize agility and climbing efficiency on hardpack trails, while fat bikes sacrifice some of that snappy handling for floatation and traction in loose conditions. The frame is also built with more clearance, and many models use a rigid or lightly suspended fork to keep weight manageable. If you ride primarily on groomed singletrack, a standard mountain bike is likely the better tool. But if you want to explore beaches, snow-packed paths, or rocky creek beds, a fat bike opens doors that remain closed to traditional designs.
What Key Features Should You Examine in a Fat Tire Mountain Bike Review?
When reading any fat tire mountain bike review , you must look beyond the glossy photos and focus on five specific components that dictate real-world performance: tire width and tread pattern, frame material, drivetrain quality, braking system, and suspension setup. These elements determine how the bike will feel on your typical ride.
Tire Width and Tread Pattern
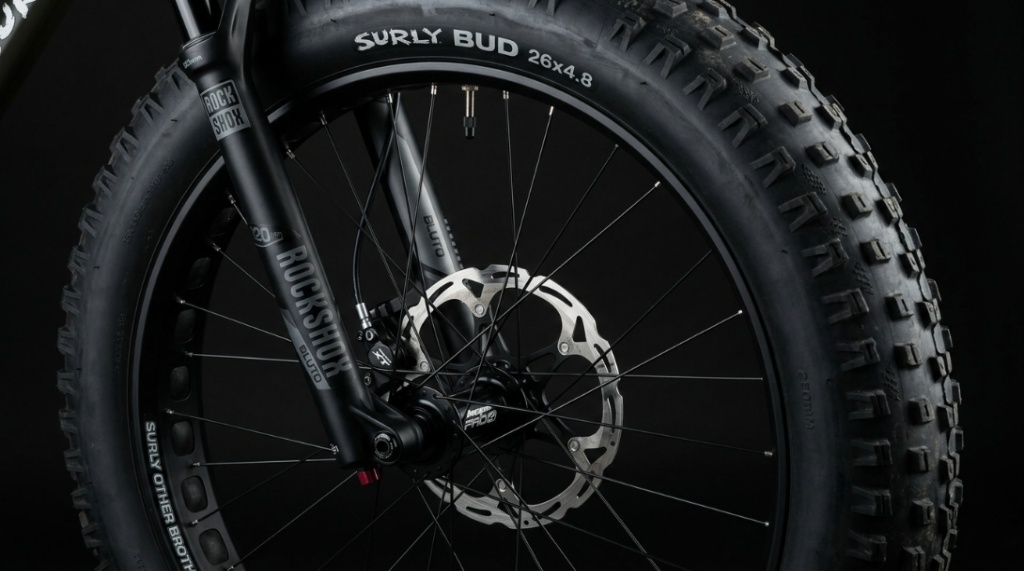
Wider tires offer more floatation but add rolling resistance. For snow and sand, look for tires that measure at least 4.0 inches wide. Tread pattern matters equally: blocky, widely spaced knobs excel in loose snow, while tighter, lower-profile tread works better on packed trails and pavement sections.
Frame Material
Aluminum frames dominate the mid-range market because they balance weight, durability, and cost effectively. Steel frames offer a smoother ride and are easier to repair in the field, but they add significant heft. Carbon frames are lightweight and stiff but come with a premium price tag.
Drivetrain Quality
Wide gear ranges are critical because pedaling oversized tires through sand or up steep climbs demands low granny gears. Look for drivetrains with at least a 10-speed cassette and a clutch-style rear derailleur to prevent chain slap on bumpy descents.
Braking System
Hydraulic disc brakes are non-negotible for fat biking. Mechanical discs lack the stopping power and modulation needed when you are hauling heavy tires and gear down slippery slopes. Always check that the brake rotors are at least 180 millimeters in diameter.
Suspension Setup
Most fat bikes ship rigid, which keeps weight down and improves pedaling efficiency. However, a suspension fork with 80 to 100 millimeters of travel dramatically improves comfort on rocky terrain. If you ride primarily on soft surfaces like snow or sand, a rigid fork is sufficient and simpler to maintain.
Which Frame Material Should You Choose Based on Your Riding Style?
Your choice of frame material directly impacts ride quality, maintenance, and budget. If you ride aggressively on technical trails and prioritize weight savings, an aluminum or carbon frame is ideal. If you value comfort for long expeditions or plan to ride in extremely cold conditions where metal fatigue is a concern, steel offers a more compliant ride and greater durability. For casual riders who stick to packed trails and want value, entry-level aluminum frames deliver reliable performance without breaking the bank.
- Aluminum: Lightweight, corrosion-resistant, and affordable. Best for most recreational riders.
- Steel: Heavier but incredibly durable and comfortable. Perfect for touring and cold-weather riding.
- Carbon: Expensive, stiff, and light. For competitive riders and those willing to invest.
How Does Tire Pressure Affect Performance on Different Terrain?
Tire pressure is the single most impactful adjustment you can make on a fat tire bike. At 5 to 8 psi, the tire conforms to soft surfaces like sand and powder snow, creating a massive footprint that prevents sinking. At 10 to 15 psi, the tire firms up for packed trails and hardpack dirt, reducing rolling resistance and improving cornering precision. Running pressures below 5 psi risks rim damage and pinch flats, while exceeding 15 psi on soft terrain negates the fat tire advantage entirely. Always use a digital pressure gauge because the difference of a single pound can transform how the bike handles. Experiment with pressures during your first few rides to find the sweet spot for your local conditions.
What Is the Best Drivetrain Setup for a Fat Tire Mountain Bike?
The best drivetrain for a fat bike provides a wide gear range with low climbing gears and reliable shifting under load. A 1x drivetrain with a 30-tooth chainring paired with an 11-to-50 tooth cassette is the current gold standard. This setup eliminates the front derailleur, reducing maintenance and preventing mud or snow buildup. Avoid drivetrains with narrow ranges or high minimum gears, as you will find yourself walking up steep inclines that a standard mountain bike might climb easily. For budget builds, a 1×10 or 1×11 setup works well. For premium builds, 1×12 offers the best gear spread and smoother shifts.
How Important Is Suspension on a Fat Tire Bike?
Suspension is important if you ride rocky or root-filled trails, but it is optional for soft-surface riding. A rigid fat bike relies on the massive air volume of the tires to absorb small bumps. That works well on snow, sand, and gravel. However, on technical singletrack with frequent drops and sharp impacts, a suspension fork with 80 to 100 millimeters of travel significantly reduces arm fatigue and improves control. If you only ride one type of terrain, choose accordingly. If you plan to ride a mix of surfaces, a lockout suspension fork lets you switch between plush and efficient modes.
Pros of Rigid Fat Bikes
- Lighter weight
- Lower maintenance
- More efficient pedaling on flat terrain
- Lower cost
Pros of Suspension Fat Bikes
- Greater comfort on rough trails
- Improved front-end traction on descents
- Reduced arm fatigue on long rides
Can You Use a Fat Tire Bike for Everyday Trail Riding?
Yes, but with realistic expectations. A fat tire bike can handle standard singletrack admirably, especially if the trail is loose, muddy, or rocky. The large tires smooth out trail imperfections and provide exceptional grip. The trade-off is slower acceleration and heavier overall weight compared to a trail bike. On smooth, hardpack trails, you will work harder to maintain speed, and the bike will feel less responsive when cornering quickly. If you have room for only one bike and want maximum versatility across different conditions, a fat bike is a strong choice. If you ride 90 percent groomed singletrack and want speed, a standard mountain bike is better.
Which Brakes Are Best for Heavy Fat Tire Bikes?
Hydraulic disc brakes with four-piston calipers are the best choice for fat tire bikes. The extra stopping power is critical because the rotating mass of large tires generates significant momentum that is harder to slow down. Four-piston calipers provide more even pad contact and better heat dissipation on long descents. Pair them with 200 millimeter rotors for maximum braking force. Avoid mechanical disc brakes entirely—they lack the modulation and power needed for safe control on steep or slippery terrain. If your budget demands a lower price point, look for entry-level hydraulic systems like Shimano MT200 or Tektro M275 rather than any mechanical alternative.
How Do You Compare Fat Tire Bikes Across Different Price Ranges?
Comparing fat bikes across price ranges requires focusing on the components that affect the ride most. In the sub-$1,000 range, expect entry-level aluminum frames, mechanical disc brakes, and basic drivetrains. These bikes are adequate for casual riding on packed surfaces but will struggle on technical terrain. Between $1,000 and $2,000, you gain hydraulic brakes, better drivetrains (1×10 or 1×11), and sometimes a suspension fork. This is the sweet spot for most riders. Above $2,000, you find premium frames, high-end suspension, and reliable 1×12 drivetrains. Create a checklist of must-have features before shopping and prioritize spending on brakes and drivetrain over frame weight.
| Price Range | Typical Components | Best For |
|---|---|---|
| Under $1,000 | Aluminum frame, mechanical brakes, 7-9 speed drivetrain | Casual riders, flat terrain, budget buyers |
| $1,000–$2,000 | Aluminum frame, hydraulic brakes, 1×10 or 1×11 drivetrain | Recreational riders, mixed terrain, value seekers |
| $2,000+ | Carbon or premium aluminum, hydraulic 4-piston brakes, 1×12 drivetrain, suspension fork | Enthusiasts, technical trails, all-weather riding |
What Common Mistakes Do Beginners Make When Buying a Fat Tire Mountain Bike?
The most common mistake is buying a bike that is too heavy or poorly speced for the riding you actually do. Many beginners focus on tire width or frame color while ignoring the quality of the drivetrain and brakes. Another frequent error is overinflating tires for comfort, which actually makes the ride harsher and reduces traction. Beginners also tend to underestimate the importance of gear range, leading to grinders up hills. Finally, many skip the test ride entirely. A fat bike feels dramatically different from a standard mountain bike, and you need to feel that difference before committing cash. Always test ride at least two models on varied terrain to gauge handling, braking, and overall comfort.
Frame geometry and tire clearance dictate how comfortable you’ll be during long days in the saddle. If you are already planning your first winter trip, matching your bike’s capabilities to your destination is crucial. For inspiration on where to take your new rig, check out our guide to Exploring Fat Biking Trails in Winter Park, Colorado, where deep powder demands optimal tire pressure and traction.
How Should You Prepare for Your First Fat Tire Bike Test Ride?
Before heading to the shop, check tire pressure with a gauge and adjust it to about 10 psi for a typical trail loop. Wear the same shoes and clothing you would normally ride in to get an accurate feel for the bike. Bring a water bottle and a small pump in case you want to adjust pressure mid-ride. Focus on how the bike feels on loose corners, how it responds when you stand to climb, and how the brakes feel under hard stopping. Take notes on what you like and do not like right away. Many shops offer demo programs that let you rent a bike for a day or weekend, which is well worth the investment before making a final decision.
Frequently Asked Questions
Are fat tire mountain bikes good for beginners?
Yes, they are excellent for beginners because the wide tires provide extra stability and forgiveness. The lower tire pressure absorbs bumps that would rattle a beginner on a standard mountain bike. However, the added weight can make climbing more challenging for newer riders.
Can I ride a fat tire bike on pavement?
Yes, but expect slower speeds and more rolling resistance than a road bike or hybrid. The tires create noticeable drag on smooth pavement. If you ride mainly on roads, consider swapping to slick tires for reduced resistance.
How much should I spend on a quality fat tire mountain bike?
A reliable entry-level fat bike costs between $800 and $1,200. For a bike with hydraulic brakes and a quality drivetrain, plan to spend between $1,200 and $2,000. Higher budgets unlock lighter frames and premium suspension components.
Do I need special tubes for fat tires?
Yes, fat tire bikes require tubes designed specifically for 3.8-inch wide tires or wider. Using standard mountain bike tubes will result in pinch flats and poor performance. Tubeless setups are popular for fat bikes because they reduce weight and allow lower pressures without pinch flats.
How do I maintain my fat tire mountain bike in winter?
Clean and dry the drivetrain after every ride to prevent rust and ice buildup. Use wet lubricant designed for cold temperatures. Store the bike indoors to keep components from freezing. Check brake pads frequently because wet, salty slush accelerates wear.
Can I fit standard mountain bike parts on a fat bike?
Many parts like handlebars, stems, saddles, and pedals are interchangeable. However, wheels, tires, and forks are often unique to fat bikes due to the increased width. Drivetrain components are typically compatible as long as you match the hub spacing.
Is a fat tire bike harder to pedal than a regular mountain bike?
Yes, especially on hardpack surfaces and pavement. The larger tires create more rolling resistance and the bikes typically weigh more. On soft terrain like sand or snow, the fat bike pedals easier than a standard mountain bike because it does not sink into the surface.
Conclusion
Choosing the right fat tire mountain bike comes down to understanding how you ride and where you plan to go. Focus on the components that matter most: tire width, frame material, drivetrain range, and braking power. Ignore marketing hype and prioritize real-world test rides. A well-chosen fat bike opens up trails and conditions that would stop other bikes in their tracks. Start by reading detailed reviews and comparing specifications side by side. Then get out and ride. Your next adventure is waiting on a set of fat tires.