
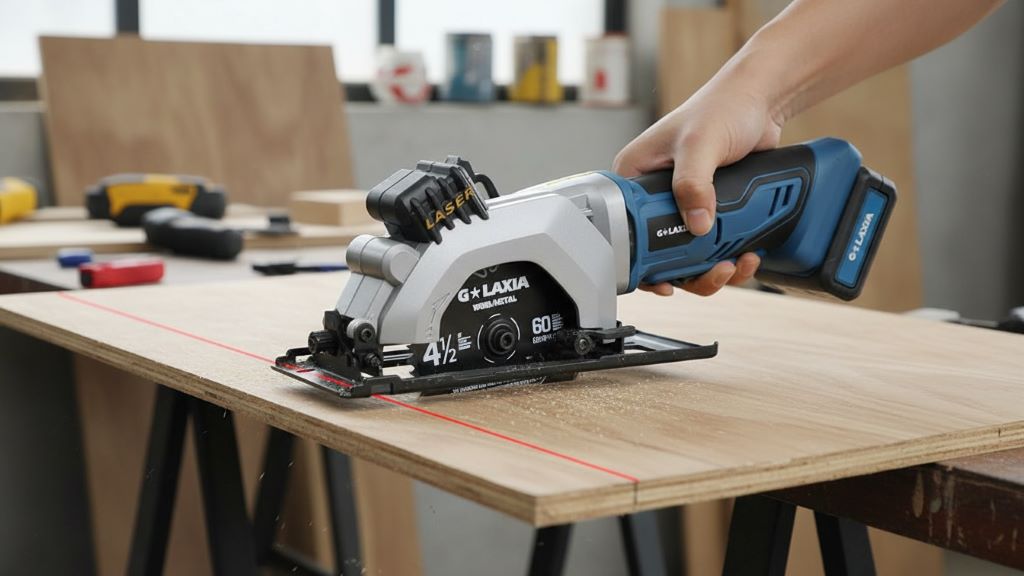
A mini circular saw can feel like a “small tool” until the first time it solves a big problem—tight spaces, quick trim cuts, cleaner sheet breakdowns, and less fatigue than a full-size saw. If you want compact cutting without sacrificing control, the G LAXIA mini circular saw stands out for its precision aids, practical adjustability, and built-in protections.
In this guide, you’ll learn the key features that matter in real use, how they affect accuracy and comfort, and how to choose settings and accessories the way experienced users do. If you care most about safety features, start here—because the best cuts always begin with safe setup and predictable handling.
Why a Mini Circular Saw Matters
A mini circular saw fills the gap between bulky circular saws and slower tools like jigsaws. Based on widely accepted industry standards, compact saws shine when you need clean, straight cuts with a guided base plate, but you also need maneuverability.
Here’s where this tool class typically helps the most:
- Breaking down plywood or panels in small shops where space stays tight.
- Cutting trim, laminate, and thin boards with better line tracking than many handheld alternatives.
- Working overhead or at awkward angles where tool weight and balance make a difference.
According to industry experts, the “best” saw in this category balances three things: stability (a solid base plate), visibility (a clear sightline or guide), and controllability (predictable power delivery and safe start/stop behavior).
Core Performance Features
Motor Power and Cutting Speed (What It Changes in Real Life)
Motor power directly affects how confidently the saw maintains speed under load. As recommended by professionals, a mini saw should cut smoothly without forcing the tool forward—because forcing increases heat, wear, and the risk of binding.
Many listings and manuals for this model family describe a no-load speed around 3500 RPM for the corded version, with similar compact-saw performance goals across variants. In practice, that speed range supports:
- Faster crosscuts in softwood and plywood.
- Cleaner cuts when you use the correct blade tooth count.
- Less burning when you match feed rate to the material.
Actionable tip: Let the blade reach full speed before contacting the workpiece. Based on manufacturer-style operating guidance used across compact saw manuals, that habit reduces chatter and improves cut quality.
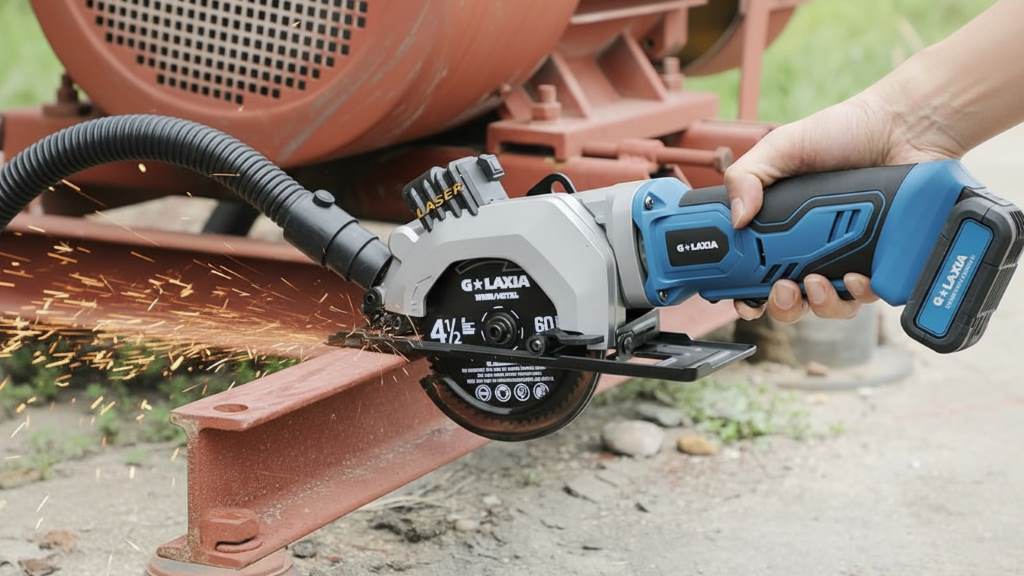
Blade Size: 4-1/2 Inch Class (115 mm)
The G LAXIA mini circular saw uses a compact blade size in the 4-1/2 inch (115 mm) range, which changes handling and cut geometry compared to a 7-1/4 inch saw. Based on manufacturer guidelines common to this category, smaller blades:
- Cut with less inertia (often easier to control).
- Fit into tighter spaces.
- Limit max depth (which can actually improve safety and precision for thin materials).
Practical takeaway: Choose this saw for flooring underlayment, trim boards, thin sheet goods, and quick utility cuts—not for thick framing lumber where depth and torque matter more.
Precision and Control Features
Laser Guide for Line Tracking
A laser guide can help you align the tool quickly to a marked cut line—especially in dim work areas or when the blade guard blocks part of the view. Based on manufacturer-style guidance, a laser works best as an alignment aid, not as a substitute for good technique.
Use the laser effectively by:
- Marking your cut clearly (dark pencil line or knife line on light wood).
- Keeping the base plate flat to avoid drift.
- Running a short test cut on scrap to confirm alignment.
Pro move: If the laser line and blade kerf don’t match perfectly, trust the blade and your cut notch indicators first. According to industry experts, lasers can shift after bumps or vibration.
Rip Guide / Edge Guide for Straight, Repeatable Cuts
A rip guide matters when you need repeated parallel cuts—like trimming multiple panels to the same width. Based on widely accepted industry standards, a fence-style guide reduces wandering and improves repeatability.
Best use cases:
- Ripping narrow strips from plywood.
- Trimming doors or shelving panels consistently.
- Making multiple identical cuts without measuring every time.
Actionable tip: Keep consistent pressure against the guide edge along the entire cut; if pressure changes mid-cut, the saw can “toe out” and widen the kerf.
Base Plate Stability and Cut Feel
A mini saw’s base plate acts like your “platform.” Based on manufacturer guidelines, stable contact between base plate and material reduces vibration and helps maintain a square cut.
For better stability:
- Support the workpiece so it can’t sag and pinch the blade.
- Avoid cutting with the offcut unsupported (a common cause of binding).
- Clamp a straightedge when accuracy matters more than speed.
Adjustability That Impacts Results
Cutting Depth: How to Set It Correctly
Cutting depth is one of the most important setup steps, and it often decides whether your cut feels smooth or risky. Many compact saw manuals recommend setting blade depth only slightly deeper than the material thickness to reduce exposed blade and lower kickback risk.
Practical depth-setting guidelines (based on manufacturer-style instructions and common safety standards):
- Set the blade so only a small portion of the tooth extends below the workpiece.
- Avoid excessive depth; it increases binding risk and makes the saw harder to control.
- Re-check depth after changing blade type, since blade thickness can vary.
If your saw supports typical mini-saw depth ranges, you’ll often see maximums around:
- About 42–43 mm at 90°
- About 28 mm at 45°
Workshop habit: Keep a scrap piece of the same thickness nearby and set depth against it before the real cut.
Bevel Adjustment: 0° to 45° Angled Cuts
A bevel range up to 45° lets you cut miters, edge bevels, and angle transitions—useful for trim and fitting panels. Based on manufacturer guidelines, bevel cuts demand extra attention because the blade engages differently and the saw can feel “pullier.”
How to get better bevel results:
- Slow down feed rate slightly at 45°.
- Clamp the workpiece (hands alone don’t stabilize well on angled passes).
- Confirm bevel angle with a speed square rather than trusting the scale for finish work.
Safety Systems and Handling Features
Guarding and Kickback Risk Reduction
In mini circular saw design, the lower blade guard plays a central role in injury prevention. Based on widely accepted safety standards used across circular saw manuals, you should:
- Check the lower guard moves freely before each use.
- Never tie or clamp the guard open.
- Keep the guard covering the blade before setting the saw down.
Kickback prevention also comes from technique, not just hardware. According to industry experts, kickback most often happens when the blade binds due to:
- Workpiece sagging
- Twisting the saw mid-cut
- Using a dull blade
- Cutting too deep
Actionable tip: Support both sides of the cut so the kerf stays open. If the kerf closes, the blade pinches and kickback risk rises fast.
Lock-Off / Anti-Accidental Start Switch
Many compact saws include a lock-off button or dual-action start to reduce accidental activation. Based on manufacturer guidelines for tools with this feature class, it helps when you reposition your grip or carry the tool between cuts.
Best practices:
- Keep your finger off the trigger until the base plate sits flat on the work.
- Use the lock-off as designed—don’t bypass it.
- Store the saw with battery removed (cordless) or unplugged (corded).
Ergonomic Grip and One-Hand Control (When Appropriate)
A compact saw often encourages one-handed use. Based on manufacturer-style safety guidance, one-handed cutting can work for light tasks only when the workpiece is firmly clamped and your body stays out of the blade line.
For safer handling:
- Use two hands whenever the cut feels unstable.
- Keep your body to the side of the blade path.
- Maintain a firm, balanced stance—especially on bevel cuts.
Related:
How to Frame a Gable Roof Without Ceiling Joists
Boston’s Pipe Dreams: How to Unclog Drains Like a Pro
Dust Management and Jobsite Cleanliness
Dust Port and Vacuum Adapter Compatibility
Mini saws throw dust close to your hands and cut line, so dust collection improves both visibility and air quality. Many versions of this saw kit include a vacuum adaptor that connects to a dust extraction port, following common manufacturer approaches for compact saw dust control.
Practical benefits:
- Clearer view of the cut line and laser.
- Less cleanup time after cutting sheet goods.
- Reduced airborne dust when cutting MDF or laminate.
Pro tip: Use a vacuum with adequate filtration when cutting engineered wood; according to industry experts, fine dust from composites irritates lungs and lingers.
Blade and Accessory Kit Features
Multiple Blades for Different Materials
What you cut matters as much as the saw itself. Many kits in this category ship with more than one blade, often including options like:
- TCT (carbide-tipped) blades for wood and plastics
- Higher-tooth-count blades for cleaner finishes
- Specialty blades for thin metals or tile (depending on kit)
Based on manufacturer guidelines, always match the blade to the material:
- Use fewer teeth for faster rough cuts in wood.
- Use more teeth for cleaner cuts in plywood/laminate.
- Use the correct specialty blade for tile or thin metal—never “make do” with a wood blade.
Spindle Lock and Tool-Assisted Blade Changes
A spindle lock simplifies blade changes and reduces the chance of slipping while loosening the bolt. Based on manufacturer-style instructions, change blades safely by:
- Disconnecting power (unplug or remove battery).
- Engaging spindle lock only when the spindle stops fully.
- Using the correct wrench and tightening securely (not excessively).
- Confirming blade direction arrows match rotation markings.
Routine check: Spin the blade by hand (with power disconnected) to confirm it clears the guard and rotates freely.
Practical Buying and Setup Tips
What to Check Right After Unboxing
Based on manufacturer guidelines and professional recommendations, inspect these before the first real cut:
- Guard action: Opens and closes smoothly without sticking.
- Base plate flatness: No wobble on a flat surface.
- Bevel and depth locks: Tighten firmly and hold position.
- Blade tightness: Bolt secure, correct blade orientation.
- Laser alignment: Test on scrap and adjust expectations accordingly.
Common Mistakes to Avoid
According to industry experts, these errors cause most “bad first impressions” with mini circular saws:
- Setting the cutting depth too deep and getting binding.
- Cutting unsupported sheet goods and pinching the blade.
- Using a dull or wrong blade and forcing the feed.
- Treating the laser like a calibration tool instead of a guide.
FAQ
Is the G LAXIA mini circular saw strong enough for plywood?
Yes, mini circular saws in this class typically handle plywood well when you use the right blade and support the sheet to prevent binding, as recommended by professionals.
What cutting depth should you use for clean, safe cuts?
Based on manufacturer-style guidance and widely accepted safety standards, set cutting depth only slightly deeper than the material thickness so minimal blade extends below the workpiece.
Does more motor power always mean better performance?
Not always—motor power helps maintain speed under load, but blade choice, feed rate, and workpiece support often matter just as much, according to industry experts.
Can you cut bevels accurately with a mini circular saw?
Yes, if the bevel lock holds securely and you slow down feed rate; based on manufacturer guidelines, clamping the workpiece improves bevel accuracy significantly.
What’s the best way to make long straight cuts?
Use the rip guide when the cut runs parallel to an edge, or clamp a straightedge guide for longer runs; professionals recommend guiding the base plate consistently without twisting.
Should you rely on the laser for precision?
Treat the laser as a fast alignment aid, not a substitute for test cuts and proper guidance; industry experts recommend verifying alignment on scrap before finish work.
How do you reduce dust when cutting MDF or laminate?
Use the dust port with a vacuum adaptor when available and pair it with good filtration; based on widely accepted jobsite standards, dust extraction improves visibility and reduces airborne particles.
What blade should you use for the cleanest finish on laminate?
As recommended by professionals, use a higher tooth count blade designed for clean cuts and reduce feed rate to avoid chipping.
Conclusion
The G LAXIA mini circular saw earns its place when you value compact control, smart guiding aids, and practical adjustability for everyday materials. Start with correct cutting depth, choose the right blade for the job, and use guides and dust extraction to raise both accuracy and comfort.
If you plan to use a mini circular saw regularly, set it up like a pro on day one: clamp your work, test on scrap, and keep blades sharp. Want better results immediately? Pick one project this week—shelf panels, trim, or flooring underlayment—and apply the setup checklist above before your first cut.
References: