

Accurate measurements are the foundation of safe and reliable electrical work. Whether you are diagnosing a circuit fault or verifying voltage levels on industrial equipment, your multimeter must deliver readings you can trust. Unfortunately, many professionals overlook the simple habits and tool choices that keep measurements precise. This guide walks you through everything you need to know to maintain multimeter accuracy on the job.
Why Measurement Accuracy Matters in Electrical Work
A small measurement error can lead to big consequences. An inaccurate voltage reading might cause you to work on a live circuit you thought was dead. An incorrect resistance value could result in an oversized or undersized component, leading to equipment failure. Therefore, treating your multimeter as a precision measurement tool — not just another piece of gear — is a professional mindset worth building early.
Additionally, many electrical codes and standards require measurements within specific tolerances. Submitting test results that fall outside those tolerances can mean failed inspections, project delays, or costly rework. Accuracy is not just about safety. It is also about your professional reputation.
Choosing the Right Multimeter for the Job
Not all multimeters are created equal. The type of work you do should guide your choice of meter.
Understanding True RMS vs. Average-Responding Meters
One of the most important decisions you will make is whether to use a true RMS multimeter or an average-responding model. Average-responding meters assume that all AC waveforms are pure sine waves. However, modern electrical systems often contain variable-frequency drives, switching power supplies, and other loads that produce distorted, non-sinusoidal waveforms.
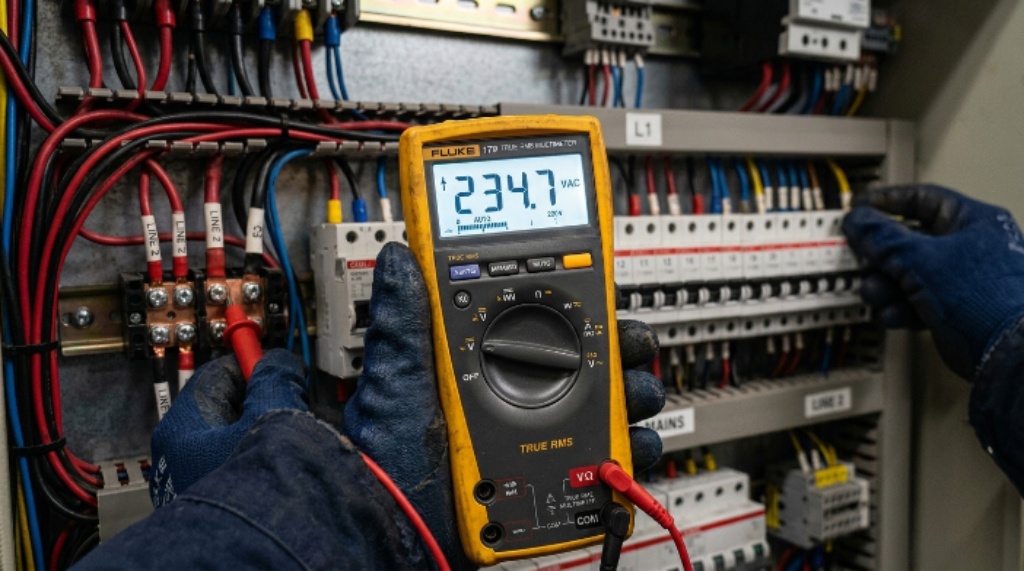
A true RMS multimeter measures the actual heating value of any AC signal, regardless of its shape. This makes it far more accurate when working with distorted waveforms. For professional electrical work, a true RMS multimeter is almost always the better choice. The added cost is well worth the improvement in reliability.
Checking the Meter’s Accuracy Specification
Every multimeter comes with an accuracy specification, usually expressed as a percentage of the reading plus a number of digits (for example, ±0.5% + 2 digits). Always review this specification before choosing a meter for a sensitive measurement task. A meter rated at ±0.1% is not overkill for calibration work or precision diagnostics. For general field work, ±1% is usually acceptable.
Additionally, pay attention to the meter’s resolution. A higher resolution means the meter can detect smaller changes in a signal, which is valuable when chasing intermittent faults.
Preparing Your Multimeter Before Every Use
Even the best meter will give poor results if you skip basic preparation steps.
Inspecting Test Leads and Probes
Test leads are often the weakest link in a measurement setup. Cracked insulation, bent probe tips, and loose banana plug connections all introduce resistance and noise into your readings. Before each use, visually inspect both leads from tip to plug. Replace any lead that shows wear or damage. This simple step alone can prevent significant voltage accuracy issues.
Checking Battery Level
A low battery does not just reduce display brightness. It can also affect the meter’s internal reference circuits, leading to inaccurate readings. Most modern meters display a battery indicator, but it is good practice to keep a spare battery in your tool bag. Therefore, always check the battery level before starting a measurement session.
Zeroing the Meter (Nulling)
For resistance measurements, always short the test leads together before measuring and use the relative (REL) function to zero out lead resistance. This is especially important when measuring low resistances below 10 ohms. Skipping this step can add several tenths of an ohm to your readings — a significant error when working with motor windings or bonding conductors.
Using Correct Measurement Techniques
Good technique is just as important as good equipment. Follow these practices consistently.
Selecting the Correct Input Terminal
Most professional multimeters have separate input terminals for voltage/resistance and for high-current measurements. Plugging a probe into the wrong terminal is a surprisingly common mistake that can damage the meter or blow a fuse — and give completely wrong readings. Always double-check your lead placement before connecting to a circuit.
Allowing Proper Settling Time
When measuring across capacitive or inductive loads, the reading may take a moment to stabilize. Rushing and noting the first value you see can introduce errors. Give the meter two to three seconds to settle before recording any measurement. This is one of the most overlooked voltage accuracy tips among newer technicians.
Keeping Leads Clear of Other Conductors
Stray magnetic fields from nearby conductors can induce small currents in your test leads, especially when measuring low AC voltages. Keep your leads as short as practical and route them away from power cables when possible. Additionally, avoid coiling excess lead length, as this can create a small but measurable inductor.
Maintaining Calibration Over Time
Even high-quality precision measurement tools drift over time. Environmental stress, mechanical shock, and simple aging all affect a meter’s internal references.
Following the Manufacturer’s Calibration Schedule
Most professional-grade multimeters should be calibrated once a year. Some manufacturers recommend more frequent calibration for meters used in harsh environments or for safety-critical measurements. Check the documentation that came with your meter and stick to that schedule. Calibration is not expensive compared to the cost of an error.
Using a Calibration Service or Reference Standard
Do not rely solely on comparing two meters to each other. If both meters have drifted in the same direction, the comparison tells you nothing. Instead, send your meter to an accredited calibration laboratory that uses NIST-traceable standards. Alternatively, you can check your meter against a known reference voltage source if your facility has one.
Recording Calibration Dates
Keep a log of calibration dates for each meter in your tool inventory. This is especially important in regulated industries such as manufacturing, healthcare, or utilities. A simple sticker on the meter case with the last and next calibration dates helps keep the whole team compliant.
Environmental Factors That Affect Accuracy
The environment where you use your meter can have a significant impact on its accuracy.
Temperature Effects
Multimeters are typically rated for accuracy at a reference temperature, usually around 23°C (73°F). Operating well outside that range introduces additional error. Most quality meters include a temperature coefficient specification that tells you how much accuracy degrades per degree of temperature change. In extreme cold or heat, allow your meter to acclimatize to the environment for at least 15 minutes before making critical measurements.
Humidity and Contamination
High humidity can cause leakage currents across the meter’s circuit board, leading to unstable readings. Dust and chemical contamination on the terminals can also introduce resistance. Store your meter in a protective case and avoid leaving it in damp environments. If the meter body or terminals look dirty, clean them with a dry or slightly damp cloth and allow them to dry fully before use.
Conclusion
Ensuring digital multimeter accuracy is not a single action. It is a set of consistent habits built around the right tool choice, proper preparation, sound technique, and regular calibration. Start with a true RMS multimeter suited to your work environment. Inspect your leads, check your battery, and zero your meter before each session. Use correct input terminals and allow readings to settle. Follow the manufacturer’s calibration schedule and keep detailed records. Pay attention to temperature and humidity. Each of these steps is simple on its own, but together they form a professional standard that keeps both you and your work safe. Accurate measurements are not just a technical goal — they are a mark of expertise.
Frequently Asked Questions
- What is the difference between a true RMS multimeter and a standard multimeter? A standard (average-responding) multimeter is accurate only for pure sine wave AC signals. A true RMS multimeter accurately measures any AC waveform, including distorted ones produced by variable-speed drives and switching power supplies. For professional electrical work, the true RMS type is strongly recommended.
- How often should a professional multimeter be calibrated? Most manufacturers recommend annual calibration for professional-grade meters. However, meters used in harsh environments or for safety-critical measurements may need calibration every six months. Always follow the manufacturer’s guidelines and keep a log of calibration dates.
- Can a low battery affect my multimeter’s accuracy? Yes. A weak battery can affect the meter’s internal reference voltage circuits, leading to inaccurate readings across all measurement functions. Always check the battery level before use and replace batteries promptly when the indicator appears.
- Why do my voltage readings fluctuate even when the circuit is stable? Fluctuating readings can result from poor lead connections, nearby electromagnetic interference, a capacitive or inductive load that needs time to settle, or a dirty input terminal. Check your connections first, then allow a few seconds for the reading to stabilize.
- Is it safe to use a multimeter on high-voltage industrial circuits? Only if the meter is rated for that voltage category. Look for the CAT (Category) rating on your meter. CAT III and CAT IV meters are designed for industrial electrical environments. Never use a meter rated below the voltage or category level of the circuit you are testing.
Related Topics:
How to Choose the Best Vacuum Cleaner for Couch Cleaning at Home
How to Pick the Best Roofing Materials in 2026 for Maximum Durability